From the cradle to the grave, in the South- at every occasion of any importance – you can mark this down, a dessert, or two or more will feature lemon. Lemon desserts are legendary and iconic… Lemon Meringue Pue, Lemon glazed Pound Cake, Lemon Ice Box Pie, wedding cakes filled with lemon curd…even our sweet tea is laced with lemon juice! However, these Lemon Squares make a regular appearance on tea tables, at baby showers, holiday dessert tables, bridal teas, anniversary and retirement parties and yes, grieved though we may be for the dearly departed- we tend to consume Lemon Squares in quantities to comfort ourselves. How do I know this? Almost every dark suit and black dress that’s been anywhere near the bereavement buffet bears a sprinkle of a telltale streak of powdered sugar! On one occasion I helped with – Lemon Squares were assigned to more than one trusted baker- but all agreed that Bennie Sue’s recipe should be used for uniform quality. Okay, I made up Bennie Sue’s name to protect the innocent. You know, there’s always at least one Bennie Sue in any southern community whose recipe is considered the gold standard. Rustic and humble in looks- not Bennie Sue, for heavens sake! No, the rustic and humble Lemon Squares- tend to take on a heavenly appearance with their light cloud-like dusting of powdered sugar. I think even the formidable Bennie Sue would approve of this recipe for Camellia’s Lemon Squares! 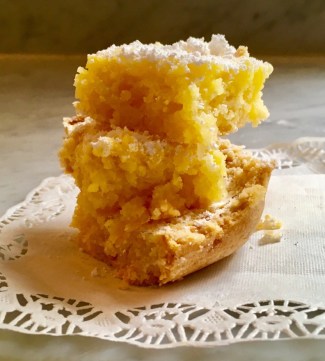
Lemon Squares…
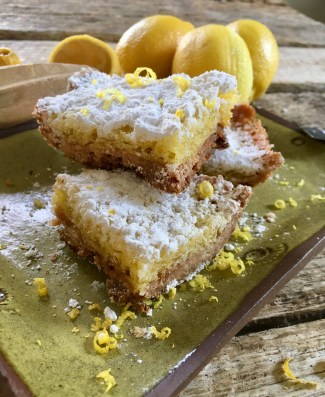
Cut in bar cookies or tiny squares, Lemon Bars are welcome any time. A shortbread type crust topped with baked lemon curd and dustEd with a snowy powdered sugar topping – it’s a near perfect addition on dessert tables or as a stand alone confection.
- 1/2 Cup Butter (Softened)
- 1 Cup Flour (Sifted)
- 1/4 Cup Sugar
- 2 Large Eggs
- Zest Lemon (from 1 large or 2 small lemons)
- 3/4 Cup Sugar
- 2 Tbs Flour
- 1/4 teas Baking Powder
- 3-4 Tbs Lemon Juice (* Freshly Squeezed – use zested lemons)
- Powdered Sugar (for Dusting )
- Preheat oven to 350 degrees. Combine softened butter, 1 cup of flour and 1/4 cup of sugar for crust. Do not overmix. Press into an 8×8 glass baking dish for crust. Bake 12 minutes or until pale but dry. Do not overtake, crust will complete baking later. While crust is baking, make lemon filling with remainder of ingredients, except powdered sugar. Mix well. Pour mixture over partially baked crust. Complete baking at 350 degrees for 15-18 minutes or until Lemon Mixture is done. ( press lightly with your finger, if no fingerprint remains, the Lemon Squares are done. Sprinkle with powdered sugar and continue to cool. Dust again with powdered sugar.
- When ready to serve, for parties, cut into small squares. As a dessert, larger squares may be preferred. * Serving suggestion: When ready to serve, top with additional lemon zest for a pretty presentation and a tart fresh taste.
While they can be made year round, winter is a perfect time for Lemon Squares. Citrus fruit is fresh and abundant. And while we do make these lemon squares for special occasions, they’re the perfect ending for a Sunday Dinner, when they can be cut generously with no complaints!
 I do recommend using three small kitchen hand tools when making lemon squares- a wooden lemon reamer – less cleanup for just one or two lemons, a small hand held specialty lemon zester for those pretty little strands and curls that add a zip of flavor, done as a flourish right before serving and- a small fine mesh strainer in stainless steel to seed and pulp the lemon juice for the filling and again for the pretty finale- the sifting flourish of powdered sugar! And we do love to add a flourish, accessorize if you will. And if there’s one thing Southern women know how to do- it’s to accessorize! Oh me, hope you’ll try them some dreary winter day soon!
Love y’all, Camellia
Health and Beauty Tips: Citrus fruits including – maybe especially lemons, are full of antioxidants, Vitamin C and those all important B for Beauty Vitamins. Some think that lemon juice even in a spa juice does help ease symptoms of the common cold. Here’s a Spa Water I made this week, with sliced ruby red grapefruit, oranges and lemon slices. if nothing else it sure was pretty- so pretty, I was enticed to drink more water! And that has to be good for your skin and keep you healthy and hydrated!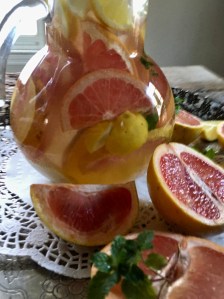
- * You can find the small kitchen tools, such as the citrus reamer, the specialty lemon zester and the small stainless steel/fine mesh sieves- at fine kitchen shops, including Williams Sonoma. (This is not a sponsored post) And! that pretty green plate? It’s made by Earthborn Pottery right here in Alabama!
- We do have some ads now, to keep the lights on… Camellia’s Cottage does not guarantee the quality of any products or services in these ads!
- *And… I just made up Bennie Sue’s name- to protect the innocent you know…
- *All photographs are obviously mine!
 Celery is so common in Southern cooking that I would say it’s an unsung hero. What surprises me is that there are so few recipes where celery is the star! Oh yes, we must have in almost everything from soups, stews, casseroles and even our beloved salads from chicken , shrimp, mixed greens and even congealed- we tend to add the refreshing crunch of crisp celery. One of my favorite family stories is when my grandmother… who was meticulous in keeping her spice drawer up to date- tossed a handful of celery seed into her small kitchen garden and was rewarded by surprise! Her own home grown celery! She was delighted and never lived it down! I think she would have loved these fun appetizers!

 The Gulf Coast states from Florida on over to Louisiana is where the sugarcane grows; you’re in cane syrup and molasses country. Sugarcane is responsible for the famous Southern Sweet Tooth, and most folks think the old fashioned molasses pie was responsible for what we know today as Pecan Pie- and where would be without that? Sugarcane is the number one cash crop in Louisiana, molasses is made by milling sugarcane and sugar beets together, it takes an astounding one ton of sugarcane to make just five gallons of molasses! So… what does that have to do with this gingerbread – well… this adaptation of an old gingerbread recipe calls for one full cup of molasses! And it’s full of spices like cinnamon, ginger, nutmeg, cloves, black pepper along with coffee and cocoa- we southerners have always loved our spices! Then, for good measure- this one also uses the zest of several oranges and at least half a jar of orange marmalade and who would argue that southern states like Florida produce bumper crops of citrus! When I was tweaking this recipe- I recalled how my grandmother wouldn’t let a grain of sugar near her cornbread but occasionally she would butter me a slice straight from the oven and say- ‘Put some of that marmalade on it!’ And oh.. it was so good! I don’t recall eating gingerbread very often- mainly it would be a wintertime cake topped with a lemon curd… any citrus does seem to brighten up a winter day! And… while I was at it? Why not make a cream cheese frosting- the classic for Carrot Cake- another wintertime favorite!
 So! that’s how ‘Where the Sugarcane Grows’ Gingerbread came about! Now, you don’t even have to put frosting on it- it’s good with orange marmalade or on it’s own. And since molasses is nutrient rich- and the spices tend to settle a queasy stomach- you might even get away with calling it health food…It’s a dense rich cake filled with enough spices to make the whole house smell wonderful, maybe seem a bit warmer and have a little something sweet on hand! Here’s how you make it:


 If there was a manual for Camellia’s Academy of Fine Arts for Polite Society, there would be an entire section devoted to the proper menus for afternoon teas, bridal showers, various receptions and occasional celebratory parties. And, you may count on Classic Cheese Straws making an honorary appearance on each and every menu. Southern Cheese Straws have been the subject of hot debate for decades…every town has at least one sweet soul who takes great pride in producing the very best cheese straws. Okay, it’s not a hot debate, it’s more like a warm undercurrent. Someone remarked recently, ‘Why, I haven’t made a cheese straw since Captain and Tennielle sang Muskrat Love, I never could get them to crisp up like Gaynelle always could.’ I can’t say I blame her!
 Join me in keeping this wonderful tradition alive- it’s an heirloom recipe. It’d be a shame for polite society if the tradition didn’t survive, especially if you live, like I do, where cheese straws are always welcome and the sugar cane still grows.
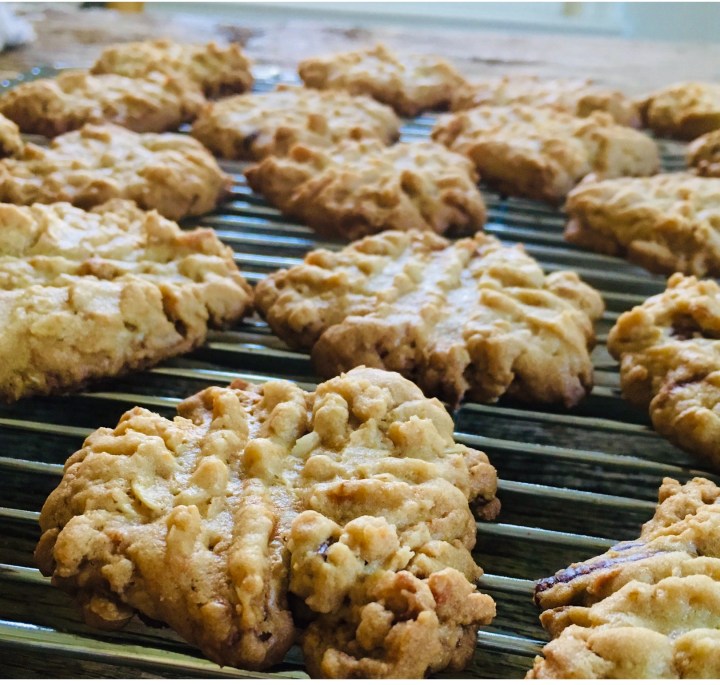
 Not a lot of cookies are made here at the cottage. Okay, I make shortbread cookies, they’re my favorite plain and also I’ve have experimented with add ins like pecans or orange zest, have even made a variation with brown sugar and pecans as a unique shortbread, but that’s about it for cookies. I do admit to enjoying bar cookies and the ease of making them,. yet I’ve wanted another cookie to add to my repertoire, if it’s a go to recipe that’s a bit different, with a crisp crumb and a bit of texture added, and of course loaded with southern flavors.
 I tweaked the old recipe and what do you know? It’s a really good cookie. World’s Best, who knows? Still. For me to put our name on it- well, it’s has to be good!